Using Loupe with .NET Container Apps
Developing & monitoring Docker Containers can present some unique challenges due to their stateless nature. By default, log information is routed to the console of the container but this provides limited display options and won’t persist data between runs. You can go farther using Loupe.
First things first - add Loupe to your .NET container following the relevant instructions in our documentation. You can also pull down the Loupe Agent repository and see a complete ASP.NET 8 container application with Loupe.
Once you’ve done that, Loupe will write logs and metric information while your container runs to a Loupe data file.
Setting Up Local Development
Ideally, you’d like containers running locally to store their log files in the same location non-container apps use so Loupe Desktop will find them automatically. You can then use all of the features of Loupe Desktop to analyze the telemetry of your app. To do this, we need to do two things:
- Bind your Log Folder to the Container: Make your local Windows log path available within the container when it runs as a temporary path.
- Set Loupe to use the Log Folder: Change the default path Loupe uses for log files from the transient location used by default in containers to the temporary path that’s bound to your local file system.
Binding Your Log Folder to the Container
You want to provide a run-time binding from a folder within your local log files path (like C:\ProgramData\Gibraltar\Local Logs\Containers) to an accessible place within the container (like /var/lib/logs). To do this, add the -v command in Docker Run, like this:
-v "C:\ProgramData\Gibraltar\Local Logs\My Product":/var/lib/logs
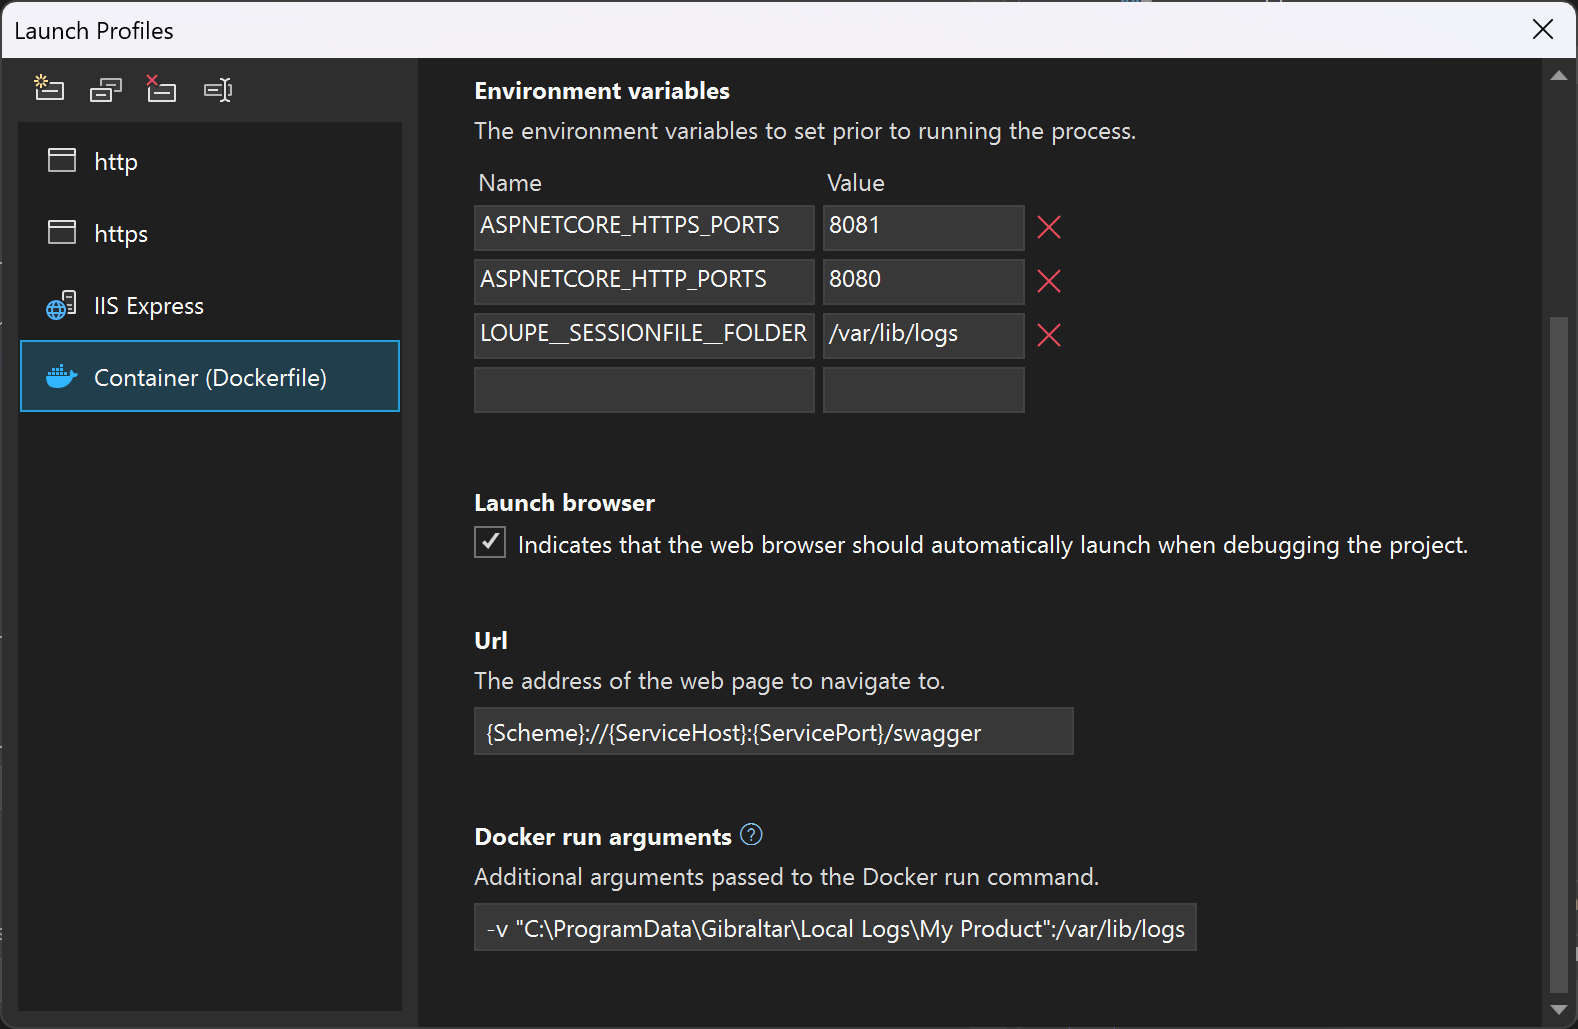
In Visual Studio, you can do this two ways: You can edit the launchSettings.json’s “DockerfileRunArguments” property to include the argument or you can use the Launch Settings UI under Debug to specify it in a GUI.
For more information on launchSettings for containers, see Container Tools launch settings.
Setting Loupe to use the Log Folder
Now we just need to add an environment variable to tell the Loupe Agent to use an alternate path for log storage. This should be specified using the file system path and format the container sees, so we specify the value we set after the colon in the option above (/var/lib/logs in our example):
"LOUPE__SESSIONFILE__FOLDER": "/var/lib/logs"
Note the double underscores (_) between each element of the environment variable name.
This is also set in the launchSettings.json file.
Using the Visual Studio GUI to set launchOptions
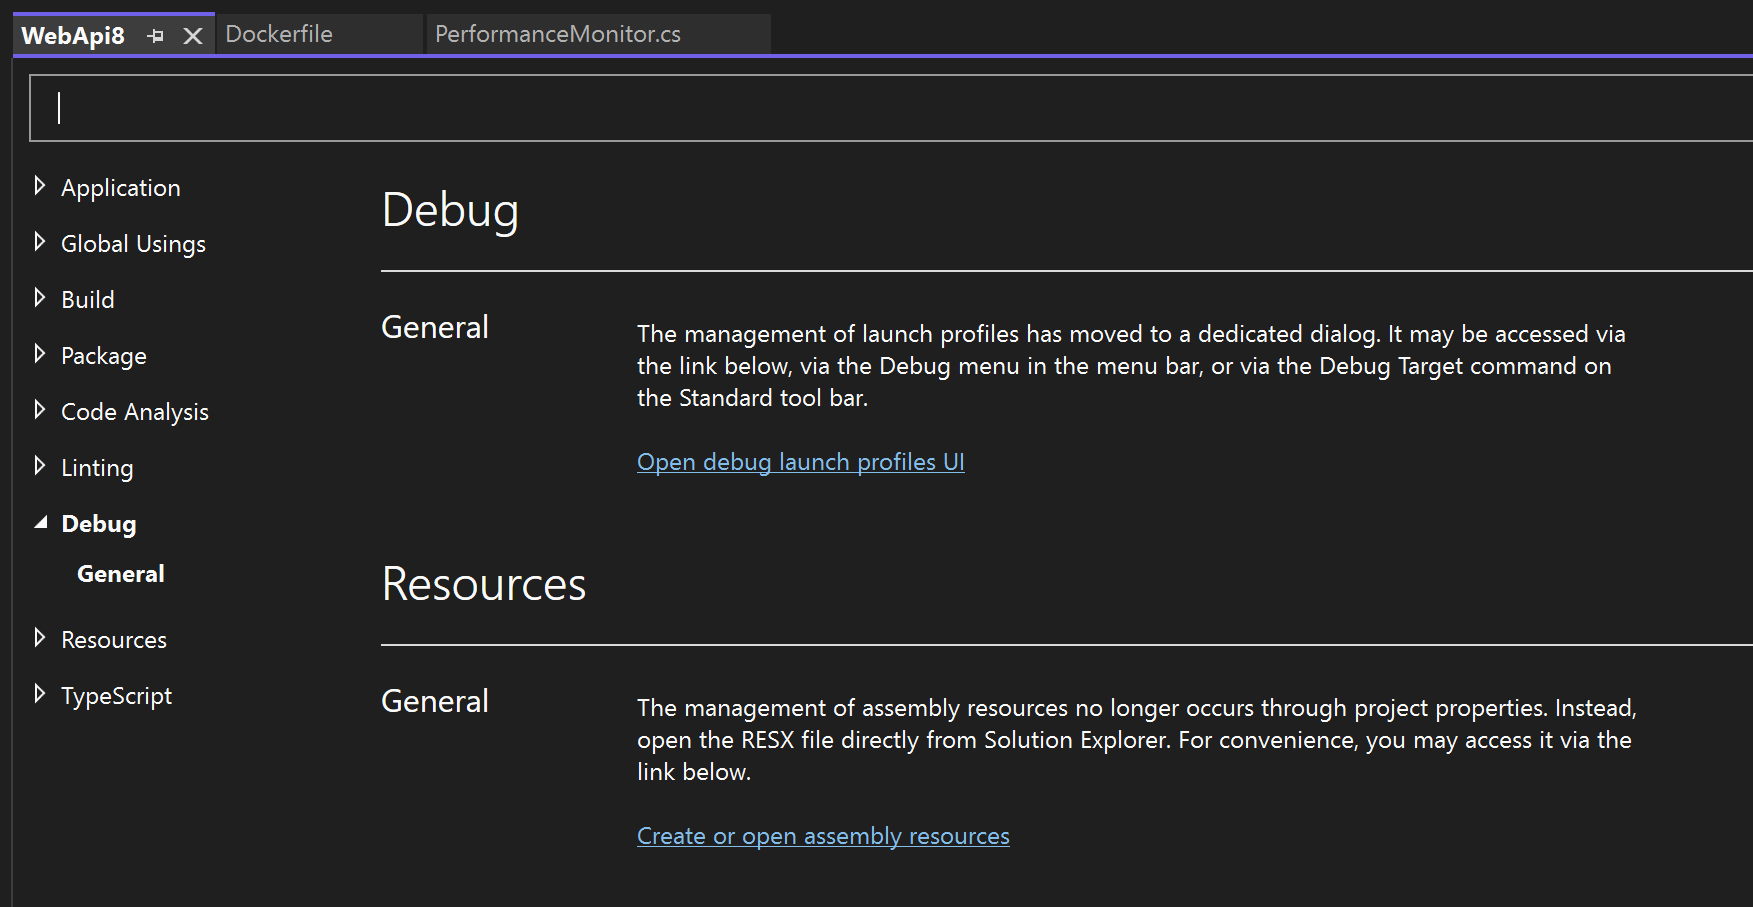
To use the GUI in Visual Studio 2022 to edit launch options, first navigate to the Debug area

Then, specify the environment variables and Dockerfile Run Arguments, like this

Using Loupe for Local Development
Once this is set, as your container runs it will write directly to your Windows file system in the exact path you bound. We recommend making a single folder in that path for your containers for simplicity - it can be called anything you like. This folder name will show up in the Local Sessions area of Loupe Desktop.
There are some key limitations to using Loupe in this way, notably that Live Sessions aren’t available. This is because the container isn’t sharing the same network stack as your Windows session is, so they can’t communicate via Localhost. You can use Live Sessions via a Loupe Server (since that uses a remote proxy).
Using Loupe for Deployed Containers
When deployed, you’ll need access to a Loupe Server to collect and relay log information from the container to where you are. Loupe Server provides a web UI to directly view information (not just the logs, but analysis of the log data like unique errors) and stores the detailed data for viewing locally in Loupe Desktop. You can sign up for a free trial to get started with Loupe Server, then decide if you want to run it yourself (self-hosted) or let us do it for you with Loupe Cloud-Hosted.
For best results, you’ll want to map a persistent volume to the container so log files are persisted across container runs. This is particularly important if you need to diagnose containers that are crashing/exiting unexpectedly. This is because the container filesystem resets completely on each restart. Unlike in the local development scenario which used Bind to temporarily redirect file system traffic to your host operation system, you’ll need to create a persistent volume in your container infrastructure then map it to a path.
Example Volume Mount
First, you’ll need to define a volume in your container infrastructure. The exact method for doing this will vary based on whether you’re using Docker directly, Azure Container Instances, Kubernetes, or some other container-based infrastructure. Assuming you create a volume named ‘logdata’, you can mount a volume during docker run like this:
docker run --mount source=logdata,target=/var/lib/logs
You’ll notice the syntax uses two variables - source and target - separated by a comma.
Sharing a Volume
You can mount the same volume for multiple container instances or use the same volume for multiple purposes without issue. Loupe is designed to automatically handle many processes writing to the same log data folder. In fact, we recommend this approach because it ensures in the event a container crashes, another container will transfer the final crash data to your Loupe Server without the original container having to restart successfully.
How Loupe Optimizes Containers
When Loupe detects it’s running in a container, it changes a few things automatically.
First, Loupe won’t track unique computers in the typical way because it would end up with a different “computer” every time a container is run. Instead, Loupe will set the host name to “container” (since the one reported by Docker is basically random) and use a consistent computer Id based on the log folder.
Second, it uses the log folder to store a shared Id for all data uploads so if you have multiple containers (potentially over many container hosts) sharing a log folder they will coordinate file transfers automatically.
Going Further
Additional options for working with Containers are in our Developer’s Guide - Agent Configuration for Containers.