Using the New Loupe Resolve for the First Time
With the release of Loupe 5, we have revamped and redesigned our application defect tracking module: Loupe Resolve. We have found it helpful for tracking problems historically, but we acknowledge that it takes some work to get it going. Here, we will review the necessary setup, standard workflows, and how to get the most out of this module.
Analyzing Your Session Data
Before using Resolve, you must have data available in Loupe View to process and ensure you use a Loupe tier that includes the Resolve module. Once you have that data, you can get started.
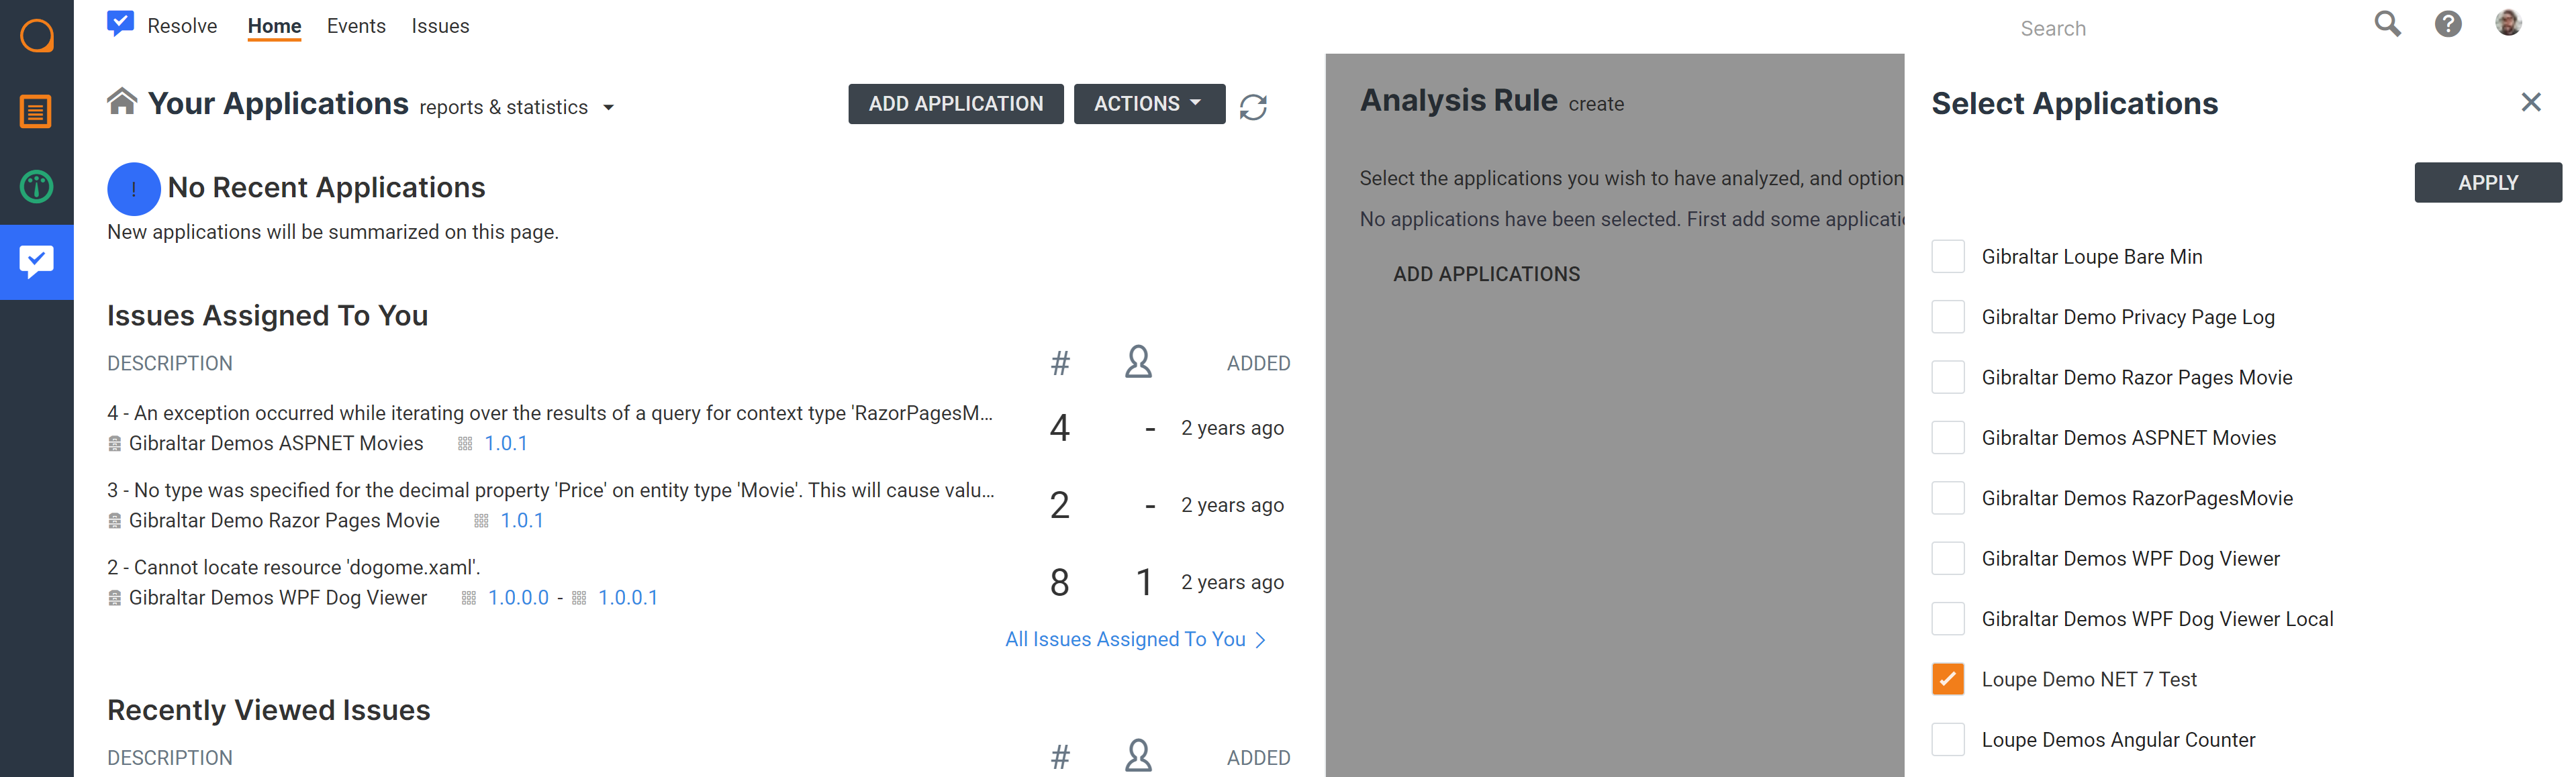
The first thing you should do is analyze the log data for an application. You can start this process with the “Add Application” button at the top of the screen. This action opens a menu where you can select any application found in your existing log data:
Once you select what you want to analyze, you can narrow down the session data analyzed to specific versions of the application:
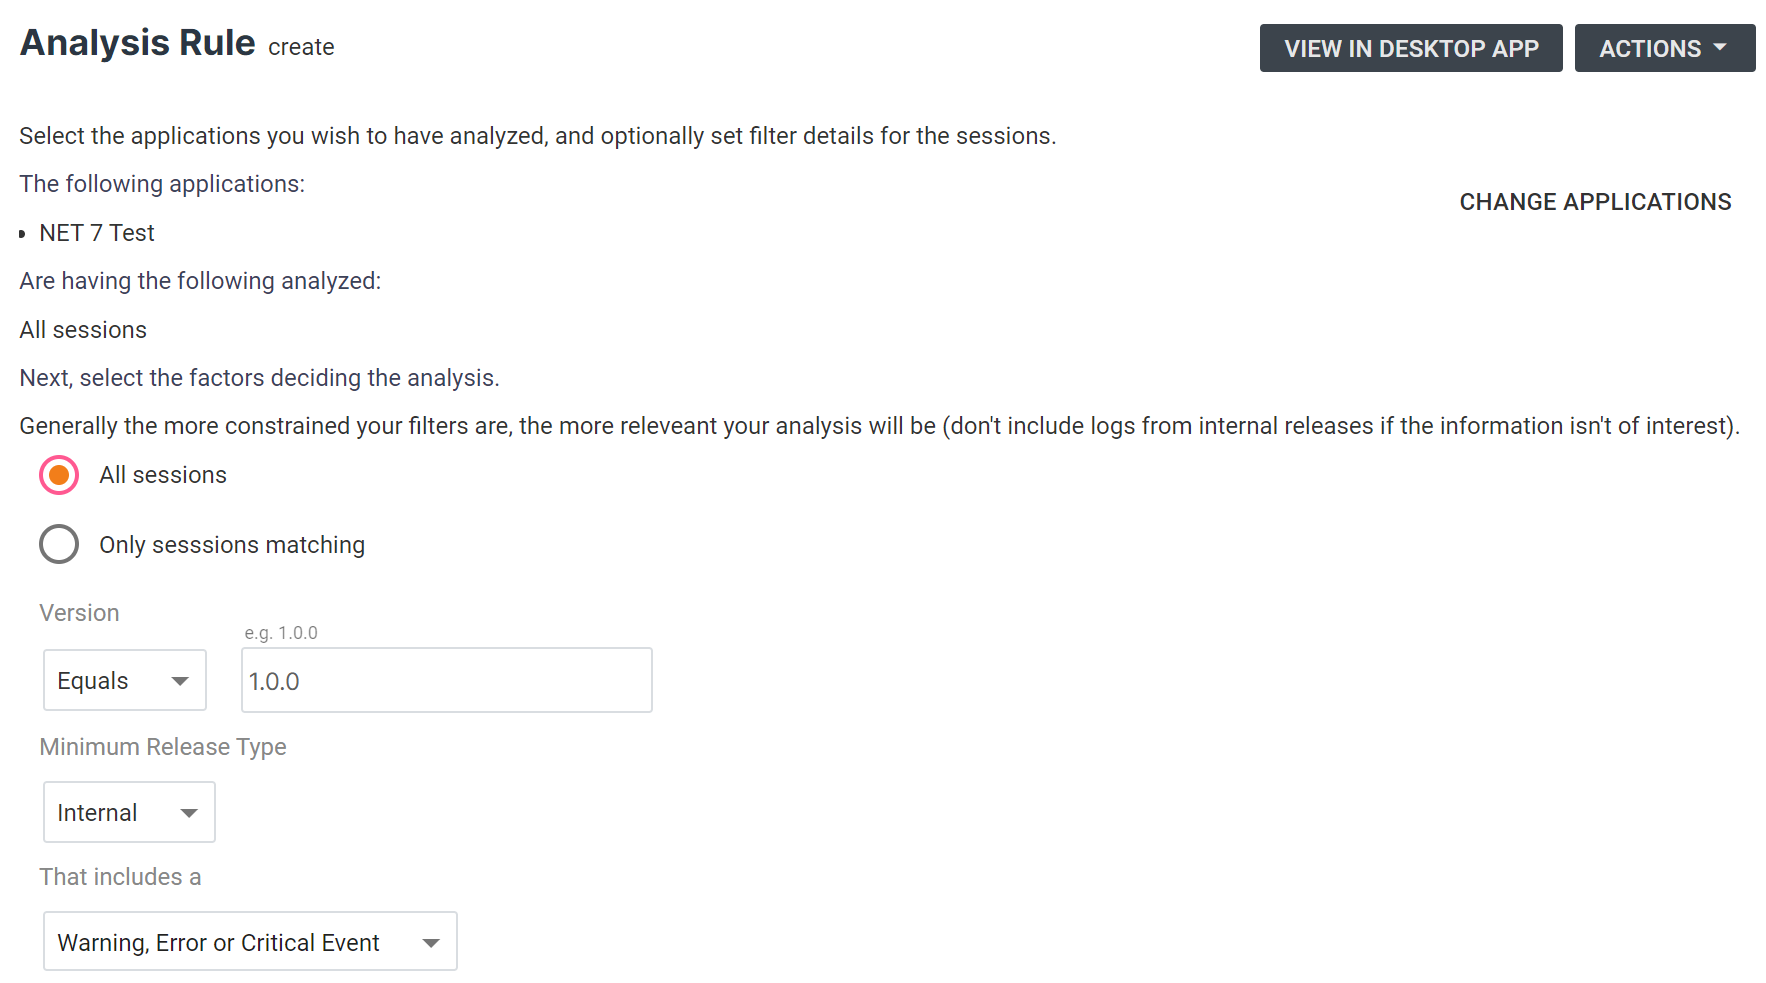
After selection, save your changes, and Loupe will make the data available in the Events list.
Filling in Your Resolve Main Menu
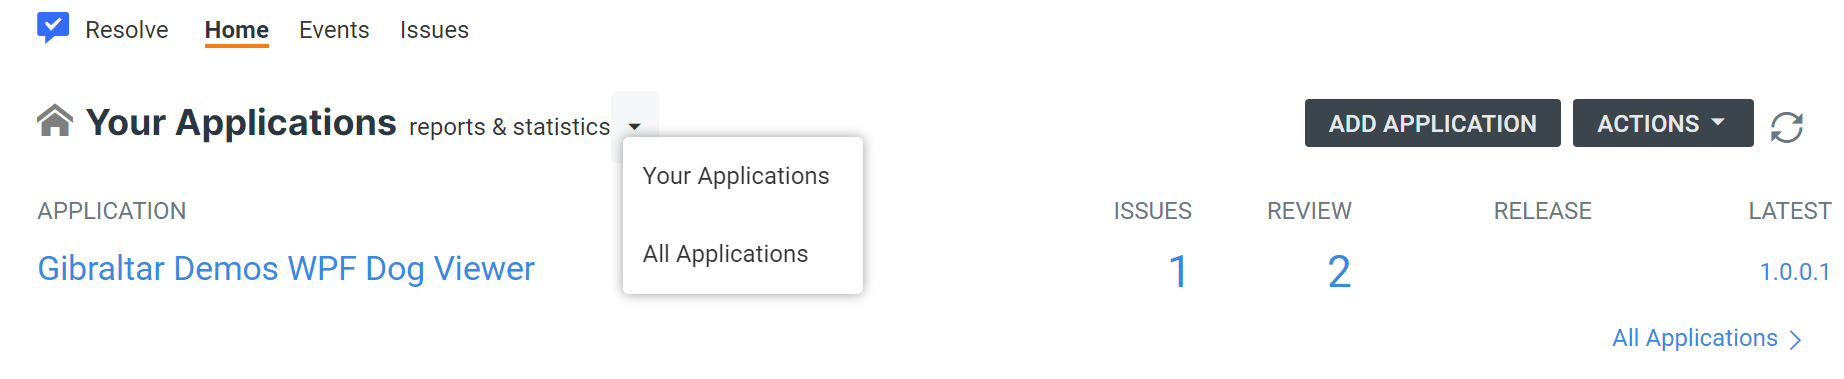
Before diving into the Events list, it’s worth some time setting up your Resolve home page. It may look pretty empty, but we can fix that! Click the arrow next to the “Your Applications” header, and click the “All Applications” option:
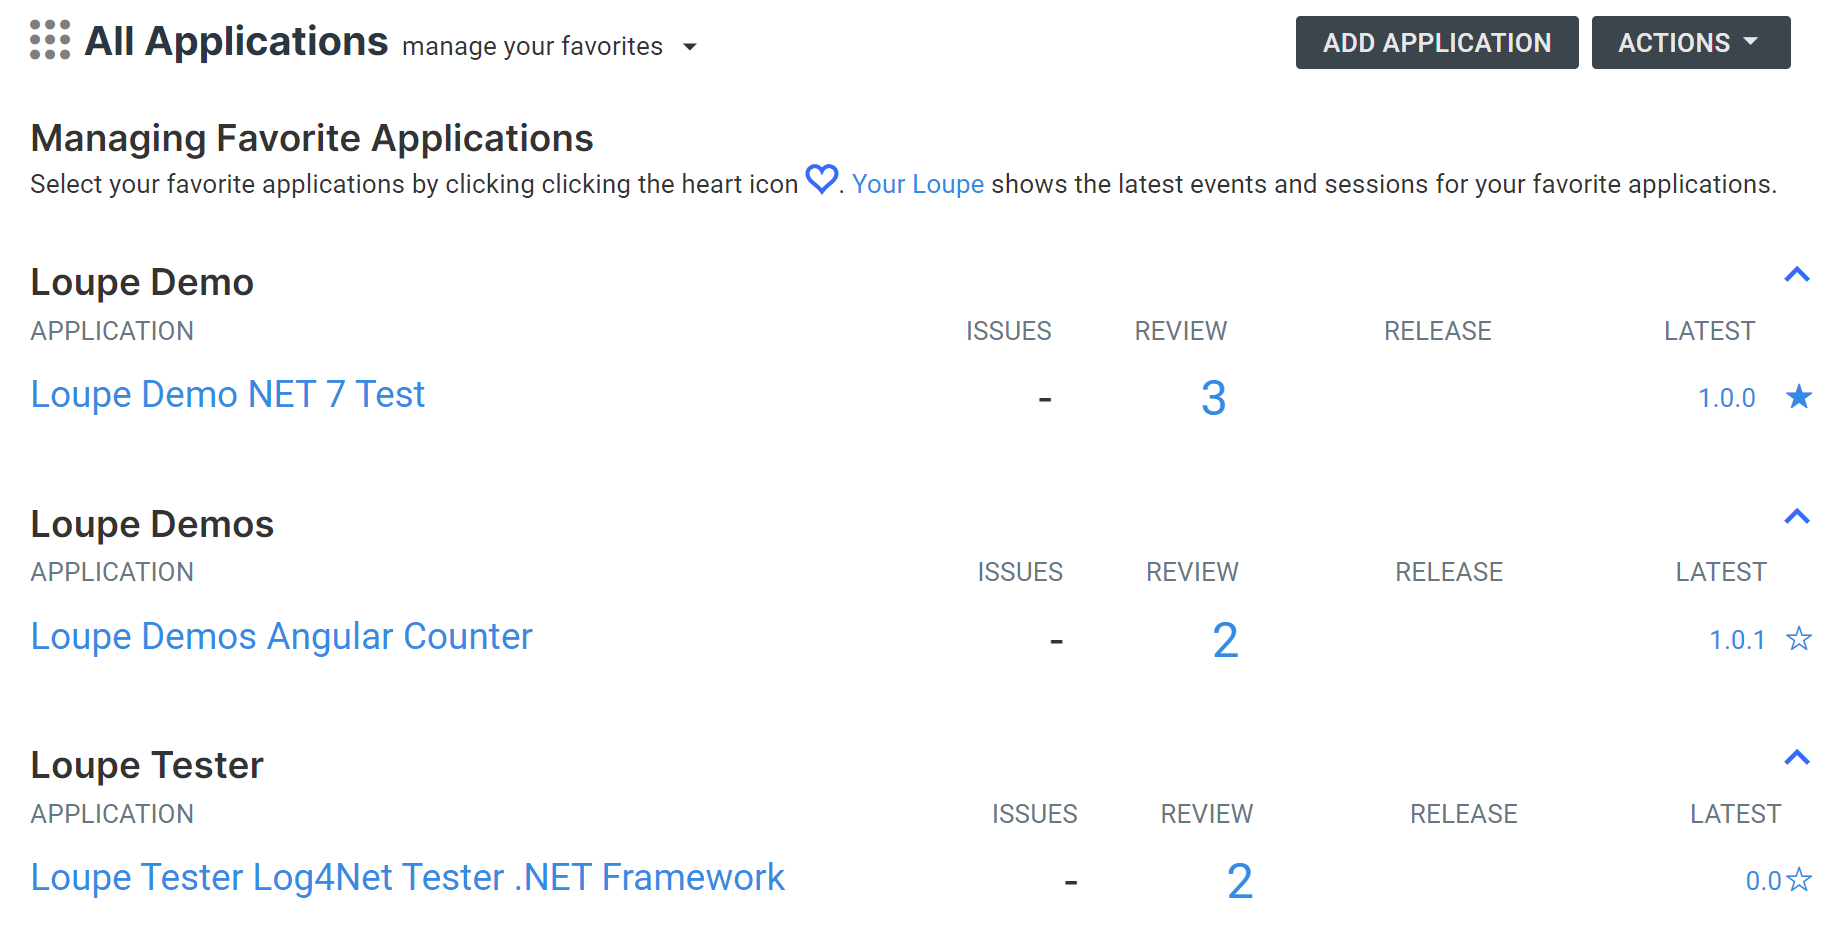
This option leads you to a menu showing every application with data on your Loupe Repo. Select any applications you want easy access to from the main menu by clicking the star on the right-hand side:
Here’s the main menu after I favorited some more of my applications:
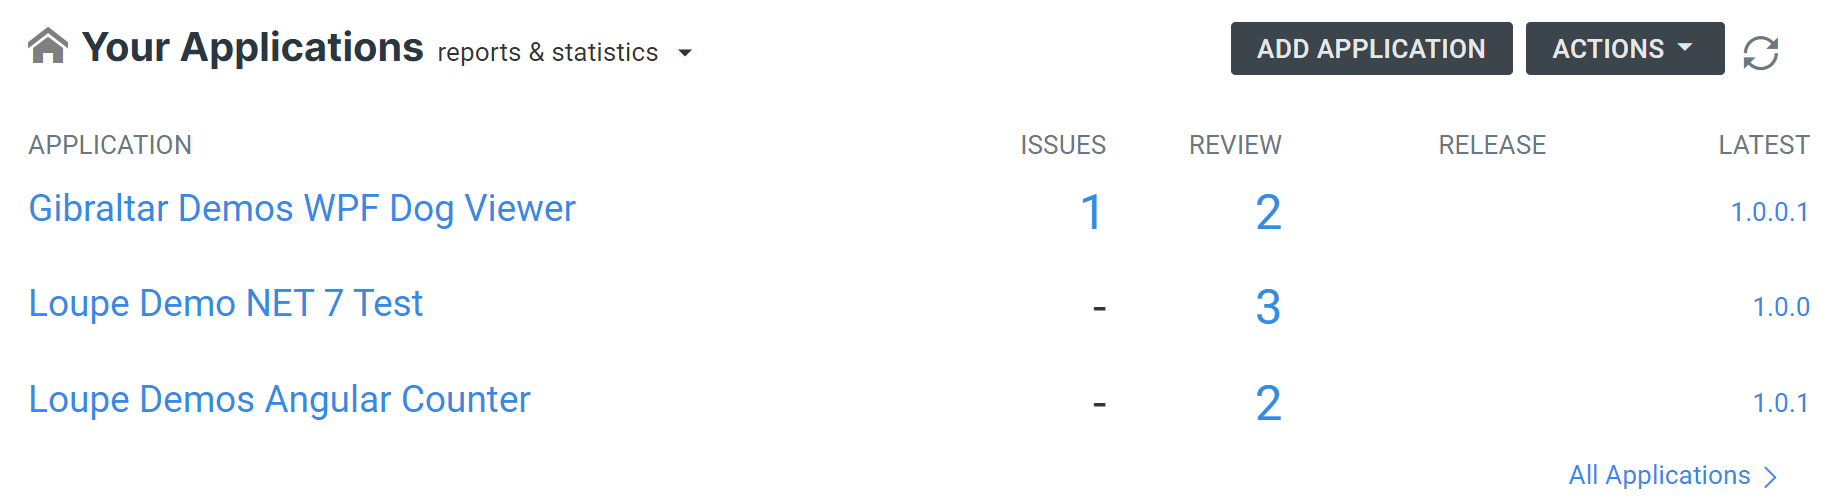
Favoriting applications makes Resolve easier to use, providing a focus and fast access to your most important programs.
Using the Events List
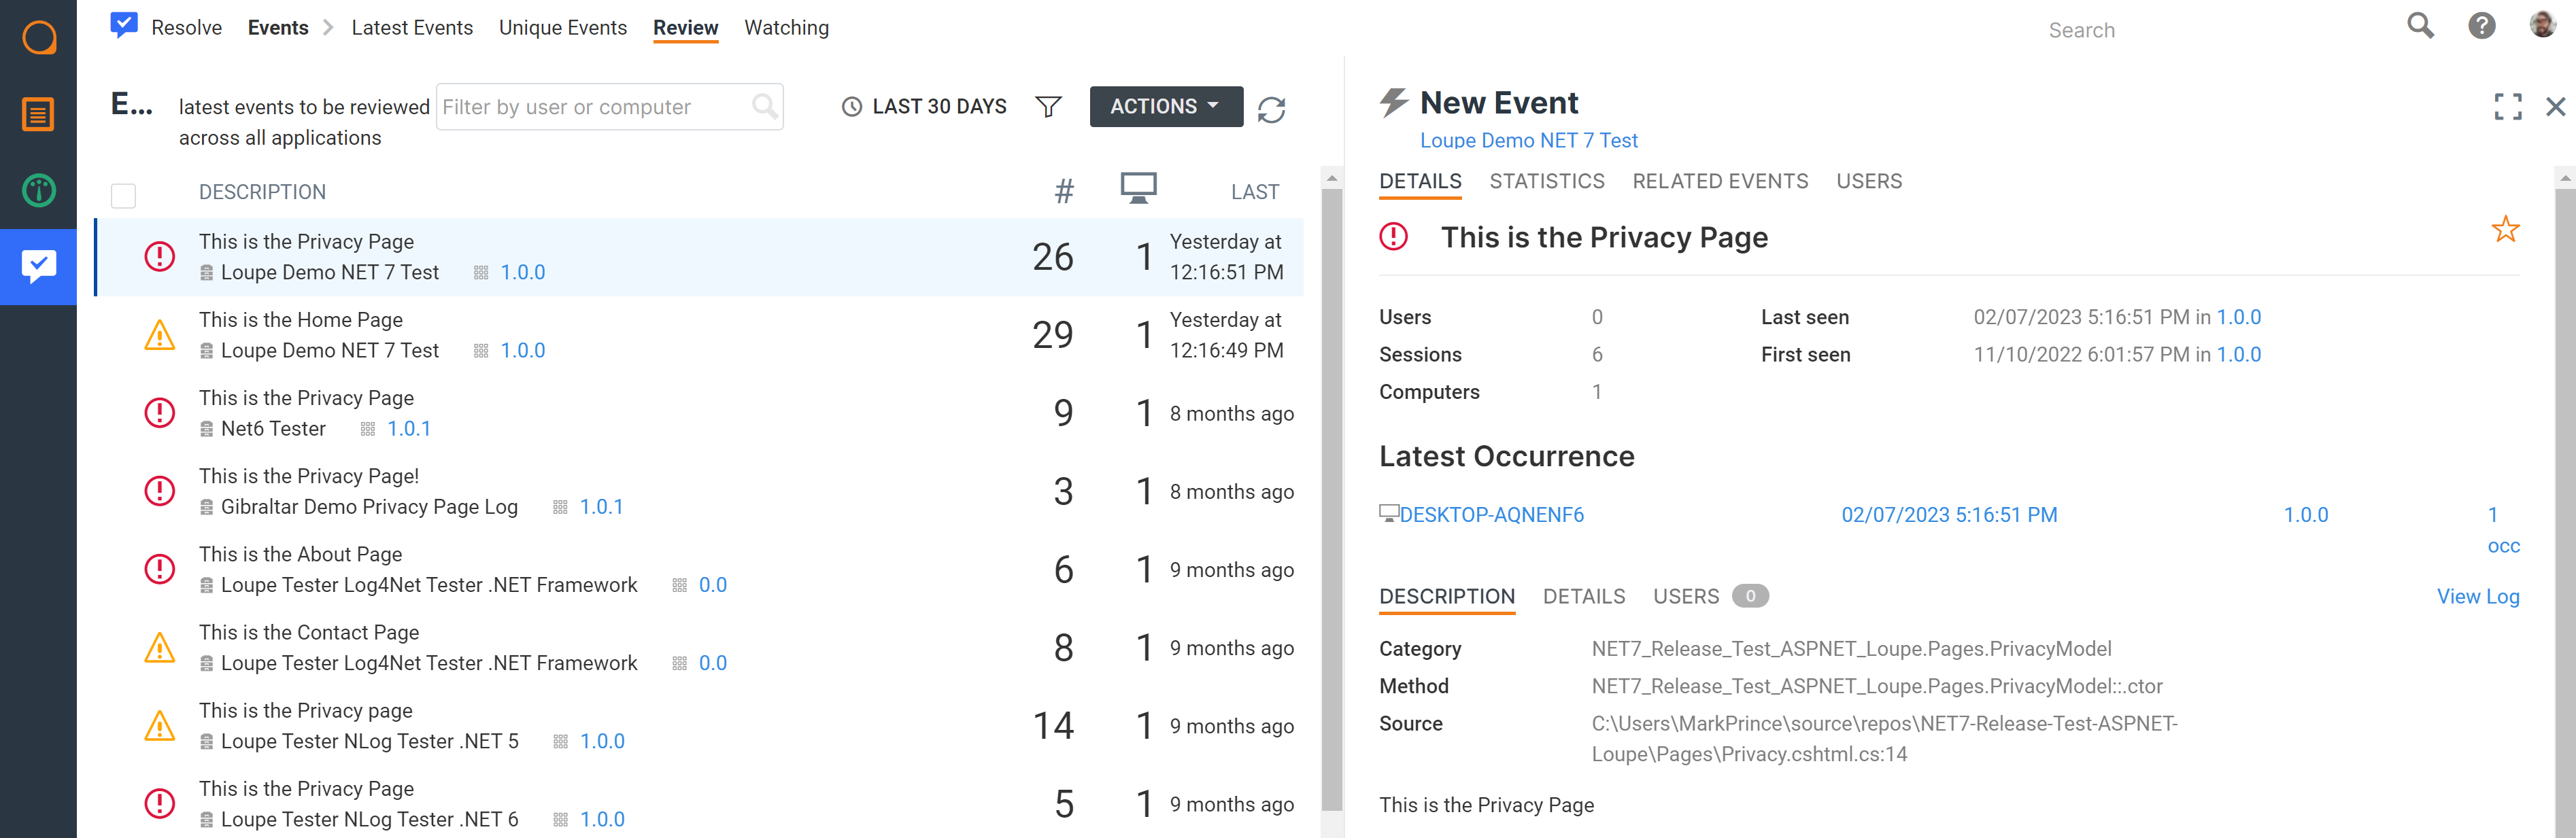
With your log data, Loupe will create Events: items dedicated to a specific error or warning. Events simplify organizing errors, as you don’t need to manage thousands of individual errors. Instead, a hundred of the same error is represented by one Event, which makes the error triage process easier.
For each Event, you have these options for how to handle them:
- Create New Issue: If this is an application defect you want to resolve, create an Issue to track its resolution and to notify you if it ever appears again.
- Add to Existing Issue: If you have an issue related to the Event, you can simply merge the Event into it.
- Ignore Event: Delay the decision. This will remove the Event from the list until it happens again.
- Suppress Event: Ignore the Event forever. It will not appear in the list, but you can still view the error in your logs.
These options allow you to manage the Events list no matter the situation. If an Event doesn’t matter to you, suppress it. If it’s an obvious problem, create a new Issue or add it to one. Of course, if you don’t want to make the decision right now, ignore it.
Working with Issues in Loupe Resolve
Issues are items used to track the resolution of an error. They are version aware and understand when an error appears in an older version of the application (where the error is expected) versus a more recent update (as long as you have deemed the error resolved beforehand).
Let’s take a look at an example Issue:
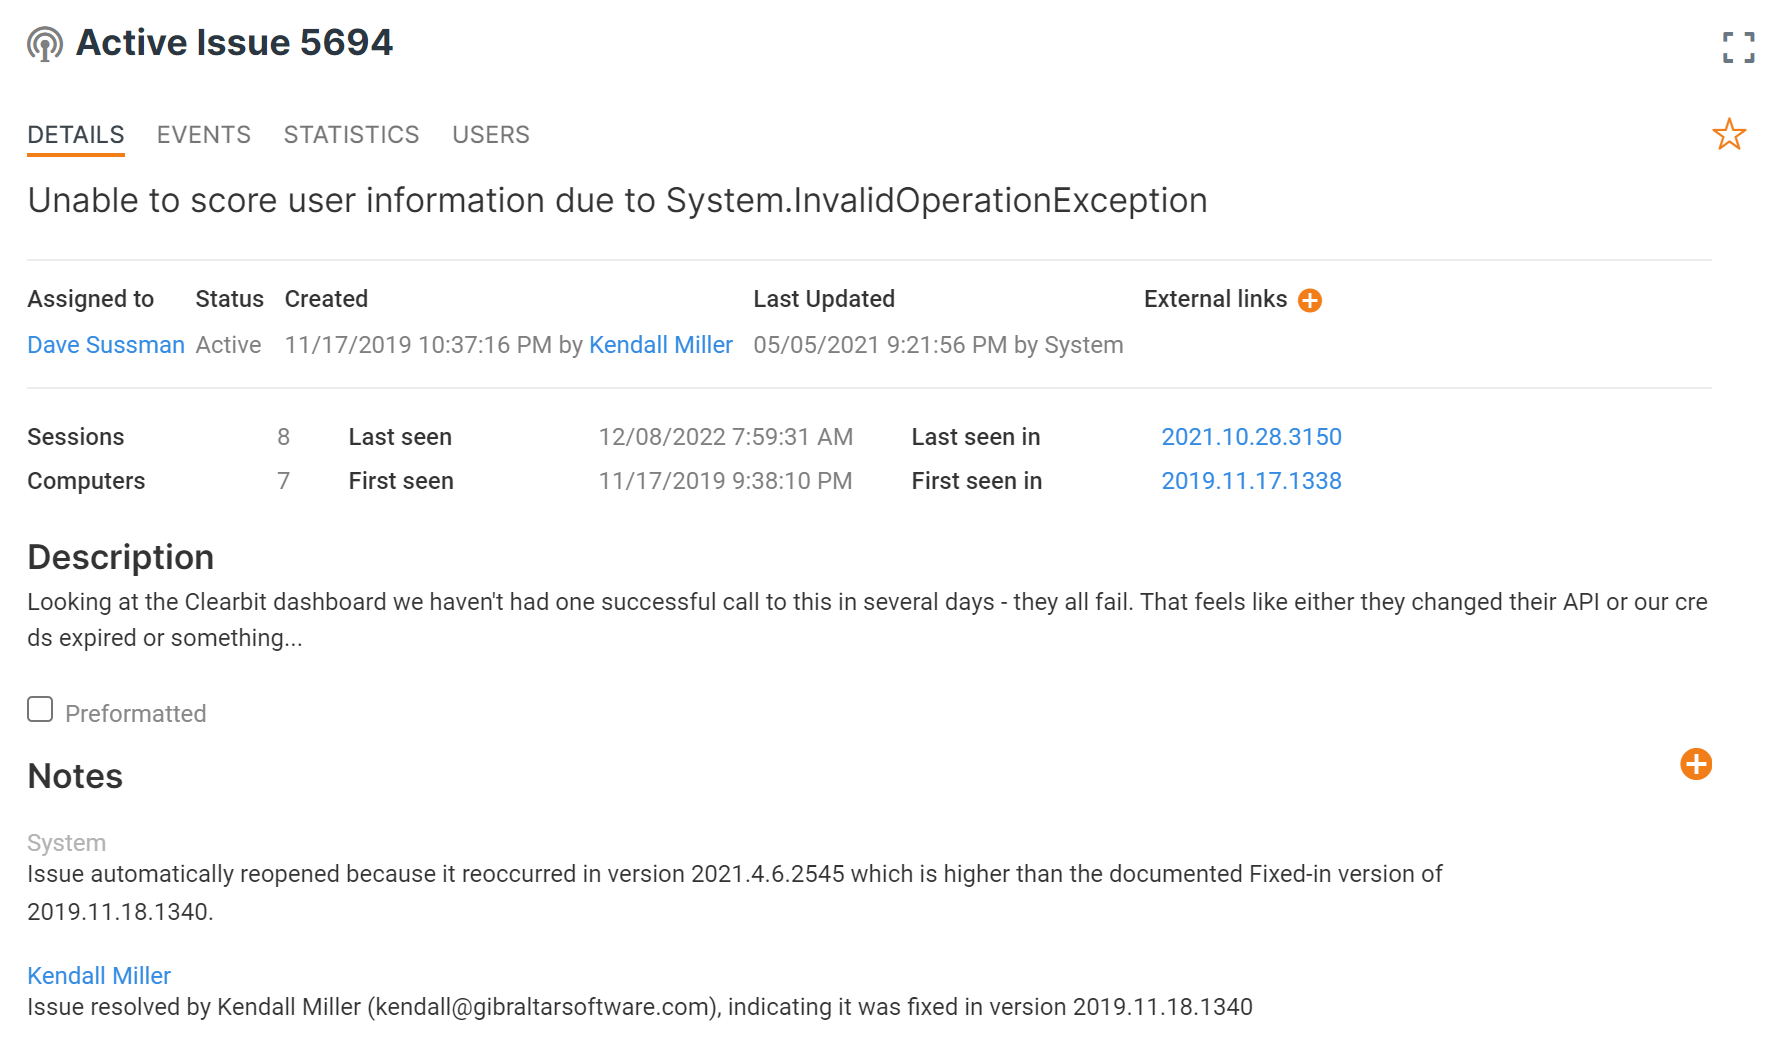
Here we see an active Issue created in a 2019 update, fixed in a patch the next day, but returned a few years later. Other information included in the Issue item includes:
- Sessions: This item tracks the number of unique sessions in which the error appears.
- Computers: This item tracks the number of unique computers on which the error occurred.
- First Seen: The first version of the app where the error occurs.
- Last Seen: Most recent version of the app in which the error occurs.
- Description: Error text or custom description of the error.
- Notes: Item for tracking custom notes and system-generated notes (this example includes a message about resolution and reactivation of the Issue).
These combined items allow you to understand a problem quickly alongside its history with the application. With that context, you can better solve problems and resolve tricky errors.
Trying Out Loupe Resolve Yourself
Whether you’re an existing or brand-new user, you can try out the new Loupe Resolve for yourself with our 30-day free trial. You can learn more about our trial in the link below.