Installing Loupe Server on Azure
We’ve seen a big increase in the number of requests to run Loupe Server on Azure in the last few months. The good news is this has been possible ever since Azure introduced Virtual Machine support - as long as you installed SQL Server on the VM. The better news is that as of Loupe 3.5.6 you can use SQL Azure. This provides a lower cost, simpler to maintain way of hosting Loupe Server in Azure.
To get up and running you’ll need to provision:
- One Windows 2012 R2 Virtual Machine: This will host the Loupe Server software - including the web site and Windows service.
- One SQL Azure Database: You can create just the Server instance and user at this time and let Loupe create the database if you like.
For our testing, we used a Small instance VM and a Web instance DB with a limit of 1GB. This means the operating cost would be just $77 per month (a lot less if you have other Azure services). A small instance is pretty tight - so for a bit more room to grow pick a Medium instance and it’s still just $122 per month.
Preparing the SQL Azure Database
When you create a new SQL Azure Database you can pick an existing SQL Server on your account or create a new SQL Server. It’s important you create the SQL Server and the Virtual Machine in the same Azure region for the best performance. When you create the database you’ll also specify the SQL Administrator account which you’ll use during the installation.
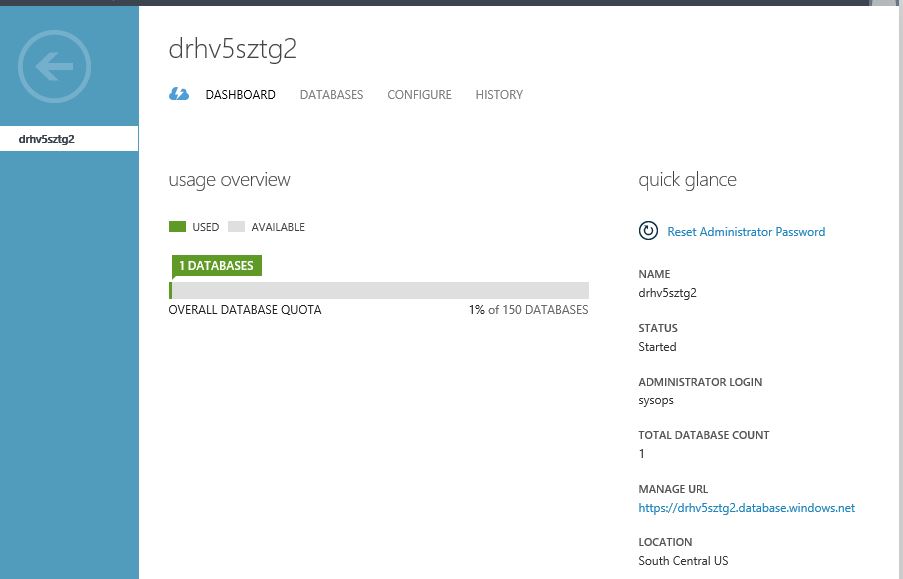
In this screenshot you can see we’ve created a database on a new server which has been assigned the name “drhv5sztg2”. In the lower right you’ll see the full server name in the management URL which is what we’ll need for the Loupe Server to connect to it: drhv5sztg2.database.windows.net.
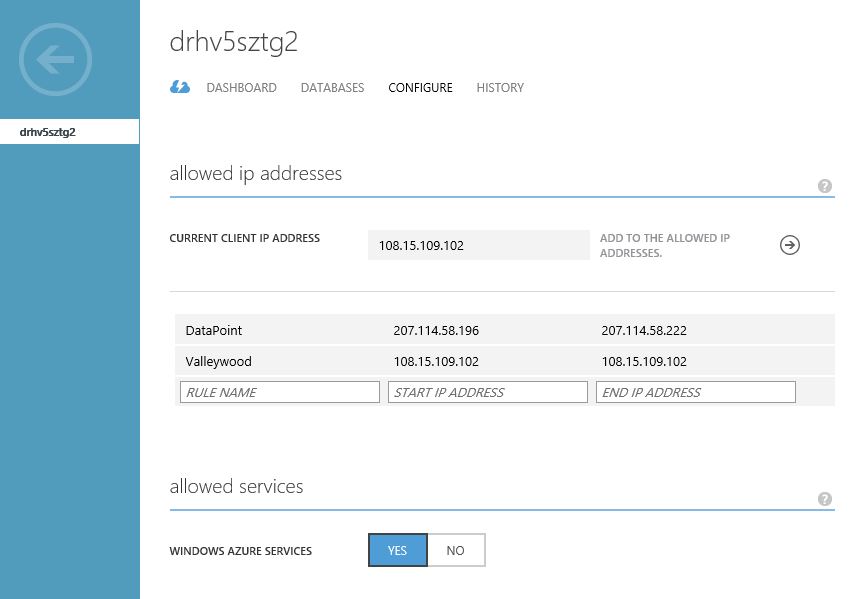
Once the database has been created you’ll need to adjust the access rules for it to be sure the Virtual Machine can get access to it. The simplest way to do this is to enable the Azure Services access.
In the example above we’ve enabled Windows Azure Services, and in this case my home address and one of our data centers, just for some additional testing I performed. If you want to access the database from your own desktop or data center, you can add the relevant IP addresses to the list.
Setting Up the Virtual Machine
To start, request a new Virtual Machine from Microsoft’s image library. We recommend the latest Windows server image - Windows 2012 R2 at this moment. You’ll want to create this as a new cloud service which will let you assign the public name your Loupe Server. Be sure to pick the same Azure region that your database server is in.
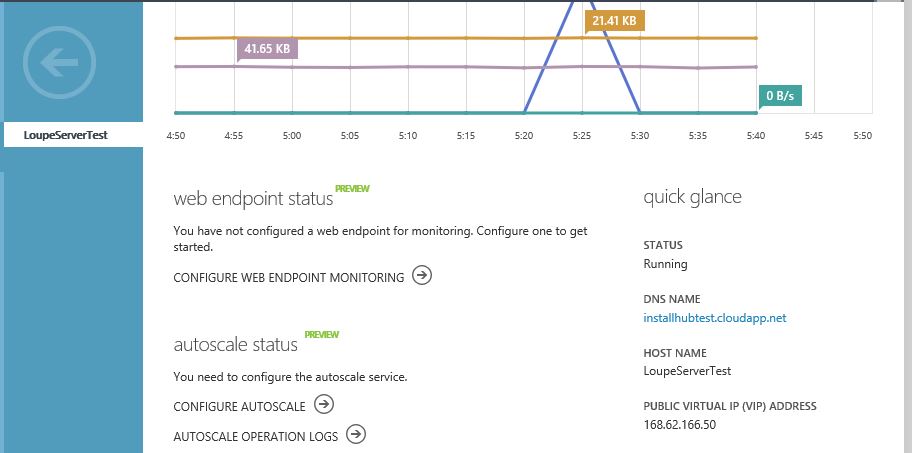
In the example above the Loupe Server’s cloud service has the name installhubtest.cloudapp.net. If you want to use a different name you can set up a CNAME on your domain and point it at this name.
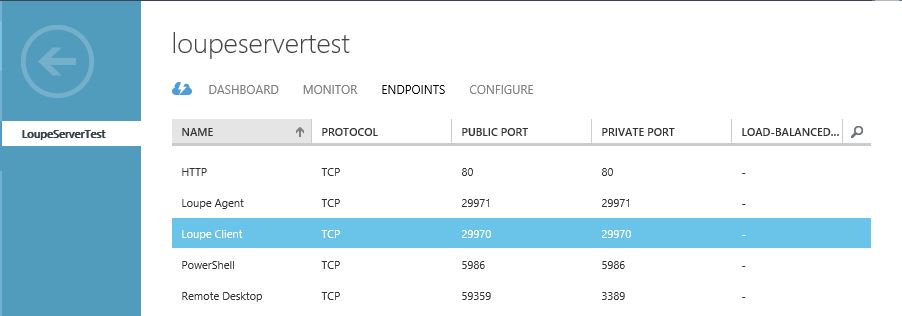
Once the VM is running you can configure the necessary endpoints. These create connections through the Azure firewall infrastructure to map traffic from the public IP address to your virtual machine. To enable all Loupe capabilities including Live Sessions we’ll need to set up three endpoints:
- HTTP: The web server itself. There is an endpoint in the list for this in Azure which has the correct port. You may also choose to add HTTPS if you want to install an SSL certificate.
- Loupe Agent: The port used for Agents to send live update data to the server. By default, this is port 29971.
- Loupe Client: The port used for Clients to subscribe to live update data from the server. By default, this is port 29970.
The example above shows all three endpoints configured, along with the default endpoints Azure makes so you can remotely access and manage the server.
Once you’ve requested the VM from Microsoft’s image library and it has started, log in using RDP to set it up just like you would your own virtual or physical server. With Windows 2012 (and 2012 R2) all of the dependencies for Loupe are readily available. To install all of the dependencies, select the following roles:
- Application Server
- Web Server (IIS)
Customize the Application Server role by selecting Web Server (IIS) Support under Role Services.
Once this configuration has been completed, you’re ready to download the Loupe installation to the server and run it normally.
Configuring Loupe Server
After the Loupe installation completes it will automatically launch the Loupe Server Administrator. This will in turn start the first time configuration wizard.
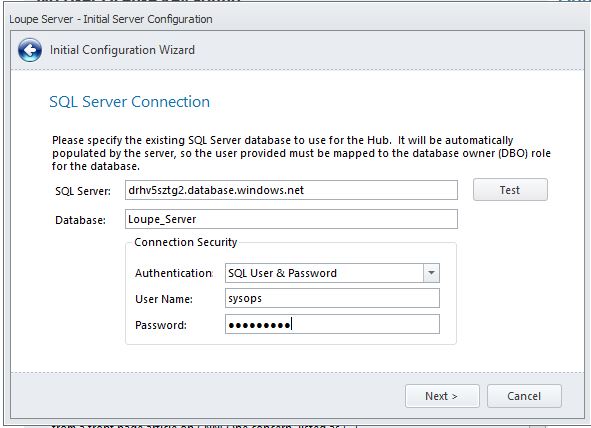
When configuring the SQL Server, be sure to provide the complete DNS name of the SQL Azure Server. Enter the database name you previously created (or another name, in which case the database will be automatically created for you) and select SQL Authentication, providing the credentials from when you created the database. The schema will be loaded into the database by the Loupe Server Administrator at the end of the wizard.
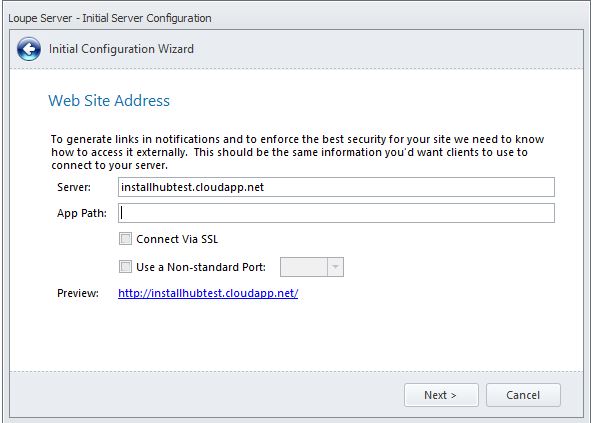
When asked for the Web Site configuration, provide the public name of your cloud service that was assigned when the Virtual Machine was created. This information is used to create links in emails and some security features.
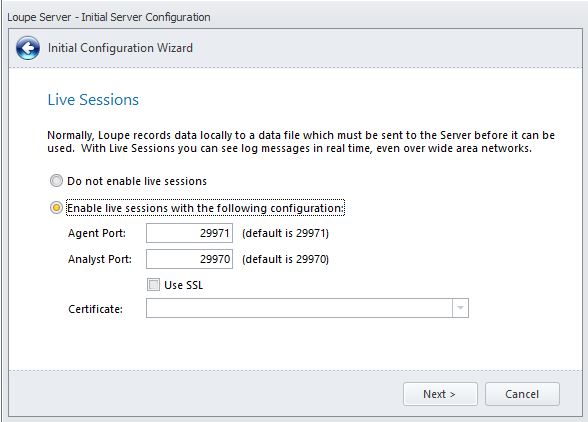
Enable the Live Sessions feature so you can view log sessions in real time. If you want you can select different ports than the defaults, in which case you’ll need to change the Azure VM endpoint configuration that was previously set up.
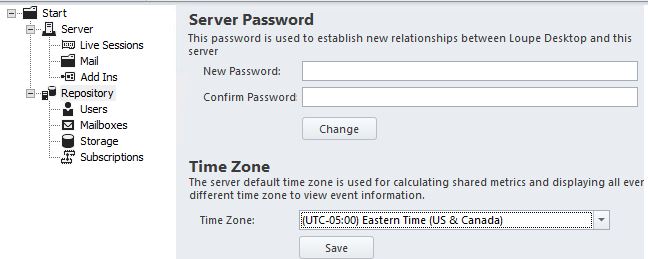
Once the wizard completes the only other thing to configure that’s Azure specific is the time zone - since all Azure VM’s have their time zone set to UTC you’ll inevitably want to tell Loupe to use a different default time zone. To do this, select the Repository node in the tree view.
In the above example I’ve changed the default to US Eastern Standard Time which is the time zone we use for our internal reporting.
Accessing Your Loupe Server
Before you can log into your Loupe Server the first time you’ll need to create an administrator. Using the Loupe Server Administrator, click on Users and you can add your first user. It will default to being an Administrator. Once you’ve added this user you can use the web interface to add the rest of the users you need.
Now that you’ve set up your server, you can access it anywhere in the world using the DNS name set up for the Azure service. You should see the web page come up within 15 seconds (giving some time for it to spin up the application for the first time). If it doesn’t show up, go back and verify that you set up the HTTP endpoint for the Virtual Machine.
Log in using the administrator account you configured and you’ll be greeted with a blank dashboard. As you send sessions to it you’ll see the applications show up on this dashboard.
Limitations and Notes Unique to Azure
There are a few caveats to hosting in Azure in the configuration described above. The first is that Microsoft will automatically restart the host underlying the virtual machines every four to eight weeks, generally without notice. When they do this your Loupe server will be unavailable for 20 minutes or so. This doesn’t affect the SQL Azure database but will affect the virtual machine.
Additionally, due to a limitation in SQL Azure compared to SQL Server there is a delay in performing background processing of up to 15 seconds. This will cause a short delay before dashboard metrics and email alerts are generated compared to using a full SQL Server.
